


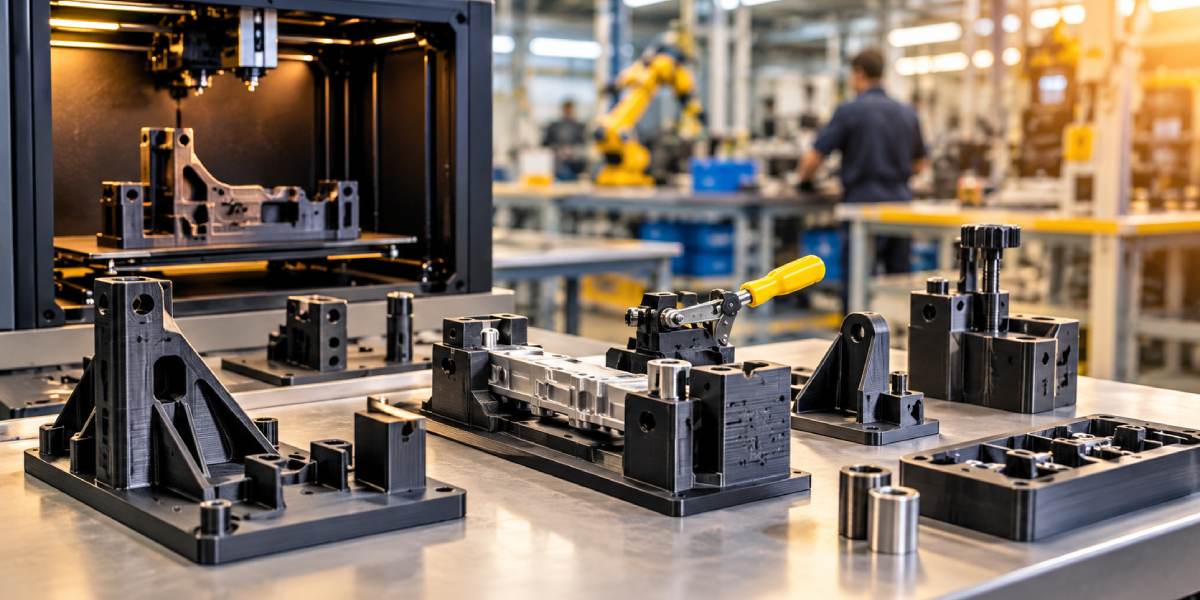
A production line can have everything it needs people, parts, and machines and still stop because one small tool has not arrived. It might be a drill guide, an inspection gauge, or a fixture that holds a component at the right angle. These tools seldom get much attention until they delay a batch.
Ordering a custom tool from a machine shop makes sense for many jobs. But when the tool is needed quickly, or the design is likely to change, the cycle of drawings, quotations and machining can slow things down. 3D printed jigs and fixtures give manufacturers a practical way to make and revise selected tools closer to the production line.
What is the difference between a jig and a fixture?
A jig guides a tool. A drill jig, for example, helps an operator put holes in the same place on every part. A fixture holds a workpiece in a consistent position during assembly, machining or inspection.
Both help make a task repeatable. The less time an operator spends positioning, measuring and adjusting a part, the easier it is to maintain a consistent process.
Where does 3D printed tooling help most?
Printing is especially useful for custom tools made in small quantities. Instead of waiting for a one-off part to be machined, a team can test a design, adjust it and print the next version. Depending on the design and available print capacity, a small tool may be ready within days or even overnight.
Common factory-floor applications include:
- Assembly fixtures that hold components in position while an operator fastens or bonds them.
- Drill and cutting guides that help repeat an operation across a batch.
- Inspection fixtures and go/no-go gauges that make quality checks easier to perform consistently.
- CNC soft jaws and workholding shaped around a particular part.
- Robot grippers and end-of-arm tooling tailored to the item being picked up.
- Packaging-line change parts for different products or formats.
Printed tools can follow an unusual part contour, include built-in handles or labels, and combine several locating features into one piece. Their lower weight can also make fixtures easier to handle at a busy station. If the product changes, the team can update the CAD model and produce a revised tool without starting a new machining job from scratch.
Cost is another reason to consider printing, particularly for one-off and low-volume tools. The comparison depends on size, material, print time and finishing needs, so it is best to evaluate the total cost of a specific tool rather than assume every printed part will be cheaper.
Choosing a material for 3D printed jigs and fixtures
Start with the job the tool must do. How much clamping force will it see? Will it contact heat, chemicals or abrasive surfaces? Which dimensions must stay accurate over repeated use?
For many assembly guides, checking fixtures and other moderate-duty applications, Markforged Onyx is a useful starting point. It is a nylon material filled with chopped carbon fiber. When the tool needs greater stiffness or must carry higher loads, continuous fiber reinforcement may be appropriate. The printer places continuous fiber within the printed part to reinforce the areas that need it.
The reinforcement available depends on the machine. The Onyx Pro can add continuous fiberglass, while the Mark Two supports options that include continuous carbon fiber and fiberglass. Read our guide to Continuous Fiber Fabrication for a closer look at the process, or explore the 3D printing materials available through Chemtron.
Which printer fits your tooling workflow?
If your team is making smaller fixtures and wants to bring routine tooling in-house, desktop printers such as the Markforged Onyx Pro and Mark Two are places to start. Compare the part size and reinforcement options against your actual tooling list before choosing a model.
For larger fixtures or a more demanding production workflow, the industrial Markforged FX10 is another option. Printer choice should follow the tools you need to make.
When should you keep a metal tool?
3D printing is not the answer to every tooling problem. A polymer fixture may be unsuitable for sustained high heat, severe abrasion or very high loads. A critical locating surface might also need a tighter tolerance or longer wear life than the printed surface alone can provide.
In those cases, you can use a metal tool or take a hybrid approach: print the main body and add a metal insert, bushing or machined datum where it matters. The right choice depends on the forces, operating environment and inspection requirements of the job.
A practical first step for manufacturers
Ask your production and quality teams a simple question: Which three tools cause the most waiting, rework or awkward setups? Start with a tool that is small, frequently changed or needed at more than one station. Record its current lead time and cost, then compare them with the printed version after it has been tested on the line.
You do not need to buy a printer to run that trial. Chemtron’s 3D printing service can produce a first part, and its printer rental option lets you explore printing in your own operation. If the design starts with a sketch or an existing component, the 3D CAD modelling team can help prepare a printable model. For a wider rollout across departments, additive manufacturing consultancy can help identify suitable applications.
Frequently asked questions
Are 3D printed jigs and fixtures strong enough for production use?
They can be, provided the material and design suit the load and environment. Printed tools are used for assembly, inspection and selected workholding tasks. Higher-load applications may call for continuous fiber reinforcement or metal at the contact and locating points. Validate the tool under real operating conditions before putting it into routine use.
How long does it take to print a fixture?
It depends on the part’s size, geometry, material and printer availability. Once the CAD model is ready, a small fixture may be printed overnight; a larger or more complex one can take longer. Include design and testing time when comparing total lead times.
Do I need a CAD model to make a printed jig?
Yes, the printer needs a 3D model. If you only have a sketch, a sample part or an existing tool, Chemtron’s 3D CAD modelling service can help create the model.
Do I have to buy a 3D printer to get started?
No. You can order a trial fixture through a 3D printing service or explore printer rental before deciding whether an in-house printer is worthwhile.
Make your next tool easier to get
The best first printed tool is often one your team already knows it needs: a fixture that takes too long to reorder, a guide that changes with every product revision or a gauge needed at a second station.
Tell Chemtron what the tool does, how it is used and where the current process slows you down. Our team in Singapore and Malaysia can help you assess the design and choose a practical route to production. Call +65 6273 7252 or email info@chemtron.asia.